
- Mark Darden
- March 18, 2023
- 12:24 pm
- One Comment
DISM (Deployment Image Servicing and Management) is Windows operating system in-build command-line tool. This troubleshooter can automatically diagnose, detect and fix errors related to image serving. The utility can be used for more tasks like repairing faulty Windows systems and drivers and restoring missing or damaged system components. The Windows fix utility is available on Windows 11, Windows 10, Windows 8.1, Windows 8, Windows 7, and Windows Vista.
| Utility name | DISM (Deployment Image Servicing and Management) |
| Developer | Microsoft |
| Specification | Windows operating system in-build tool |
| Supported OS | Windows 11, Windows 10, Windows 8.1, Windows 8, Windows 7, Windows Vista |
| Features | System troubleshooter can run diagnostic tests, detect issues, apply fixes, verify results |
Table of Contents
What Is DISM?

Deployment Image Servicing and Management is a powerful tool that can analyze and fix various files like a .wim file, .ffu file, .vhd file, or a .vhdx and others. Used to service Windows images, including offline images, online images, and virtual hard disks (VHDs). DISM.exe is located in the c:\windows\system32 folder, but the utility can be opened from any location in the command prompt. It is recommended to run the first System File Checker SFC scan and, just after, proceed with Deployment Image Servicing and Management utility. Additionally, you can further optimize your system by using the CHKDSK tool to check for any file system errors
The provided table shows the most used Windows command-line tool commands and their descriptions.
| COMMAND | Description | DISM /Online | Checks and updates the operating system |
|---|---|
| DISM /Cleanup-Image | Removes unnecessary files and data from a Windows image to reduce its size |
| DISM /RestoreHealth | Checks for any damaged files and repairs them. |
| DISM /Image | This command is used to service an offline Windows image |
| DISM /ScanHealth | Checks the health of a Windows image |
| DISM /CheckHealth | Checks is a Windows image corrupted or not |
| DISM /Get-WIMinfo | Provides information about a Windows image |
Run the DISM (Deployment Image Servicing and Management)in Microsoft Windows
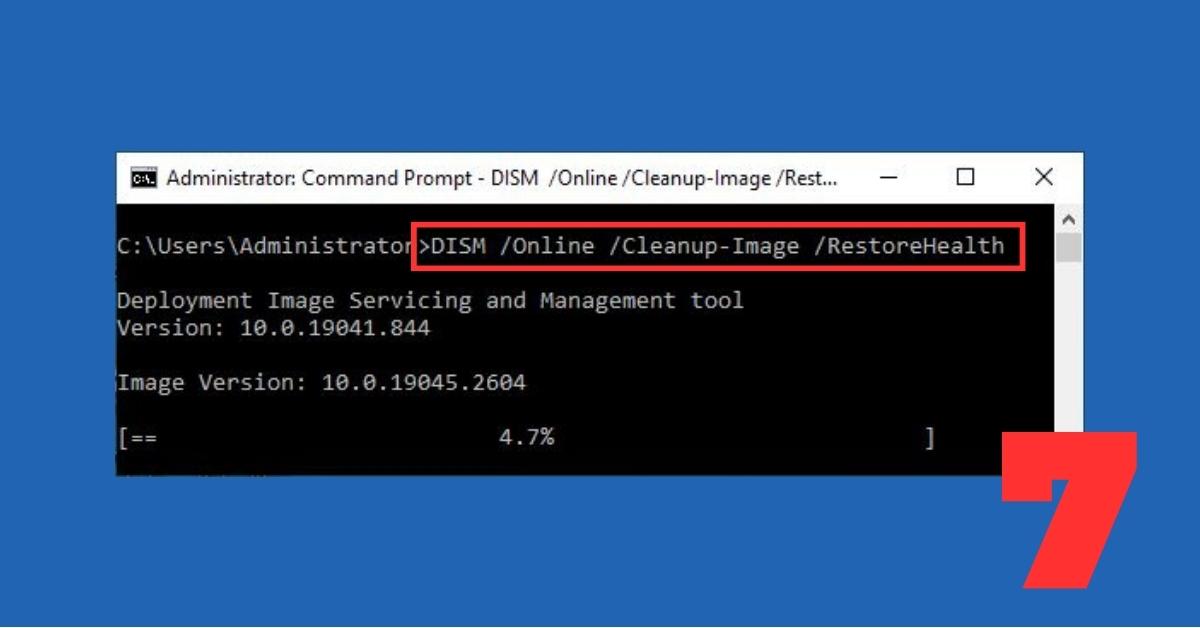
We tested this utility all abilities and can confirm it is a really helpful and powerful tool. The most effective way to use this utility is a special set of the command: DISM /Online /Cleanup-Image /RestoreHealth this combination will do all tasks automatically proximally in 5 minutes. Using this command internet connection must be available, and DISM fix utility will connect to the online Windows database center to download fresh copies of damaged system files.
TIP: To ensure a healthy and stable Windows system, we suggest Method 5, which does not require any third-party software. It is recommended that this method be implemented even if the error has been resolved.
Fixerrs Tweet
Method 1: Run DISM on the Windows Task Manager
This is a great option for Windows 10 and Windows 11 users. Using the task manager is the quick and most easy way to run Deployment Image Servicing and Management Windows OS fix tool.
- Press the Ctrl+Shift+Esc keys together to open the Task Manager.
- In the top-left corner of the window, click on File.
- On the drop-down menu, select Run new task.
- In the Create new task window, type DISM /Online /Cleanup-Image /RestoreHealth (with a space before all _/ forward slash character).
- IMPORTANT to check the box Create this task with administrative privileges.
- Click the OK button to confirm the task.


Method 2: Run DISM in the Command Prompt (Admin)
Deployment Image Servicing and Management utility can be used in the Command Prompt in all versions of Windows OS, including Windows 7, Windows 8, Windows 8.1, Windows 10 Windows 11 important to run CMD as admin in all OS versions.
- Click the Windows logo (Start) button.
- Type CMD in the Windows search box.
- IMPORTANT run Command Prompt (CMD) as administrator.
- In the task manager, type DISM /Online /Cleanup-Image /RestoreHealth (with a space before all _/ forward slash character).
- To start the fix utility, press ENTER key on the keyboard.


Method 3: Run DISM fix utility on the Windows PowerShell (Admin)
Windows Powershell is an alternative for CMD in newer Windows versions like Windows 11 and Windows 10 OS. The same command for the fix utility applies to both CMD & Powershell.
- Right-click on the Windows Start icon in the taskbar.
- Select Windows PowerShell (Admin) from the menu that appears.
- In the PowerShell window, type dism /online /cleanup-image /restorehealth and press Enter.


Method 4: Run DISM in Windows recovery mode
Windows OS can be faulty and not responsible. In this case, it is not possible to run any commands. But this fix method will open the Recovery Environment that can help to troubleshoot and repair Windows operating system.
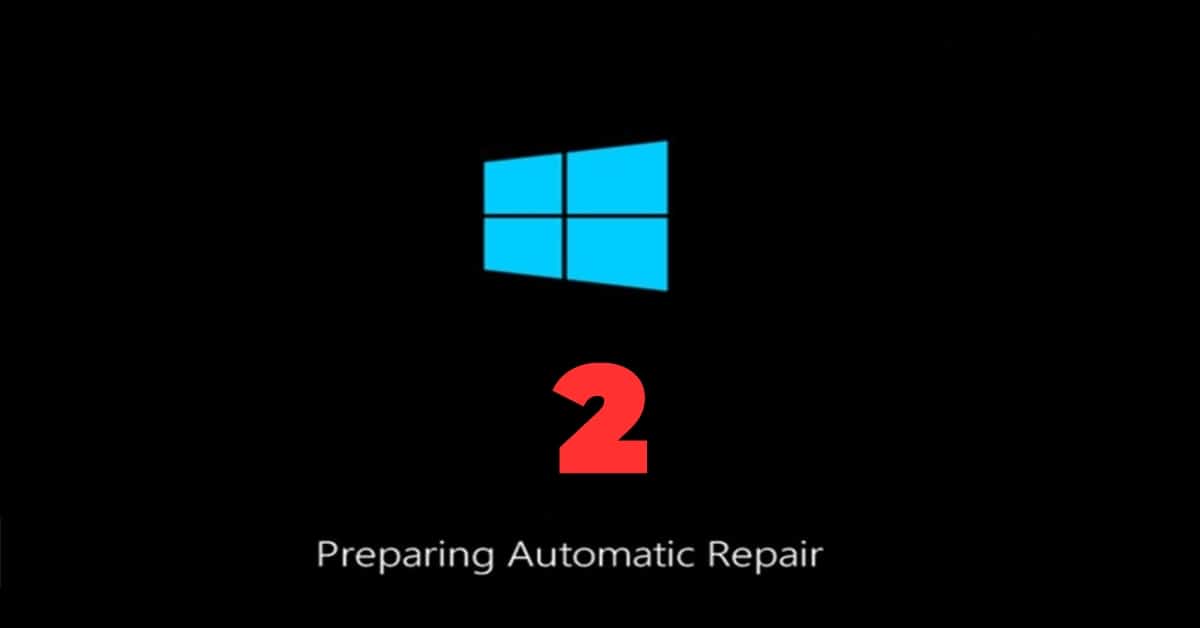
- Load OS until the Windows logo appears.
- Right away press and hold power button until the PC shuts down. repeat it couple times until you see Preparing Automatic Repair.
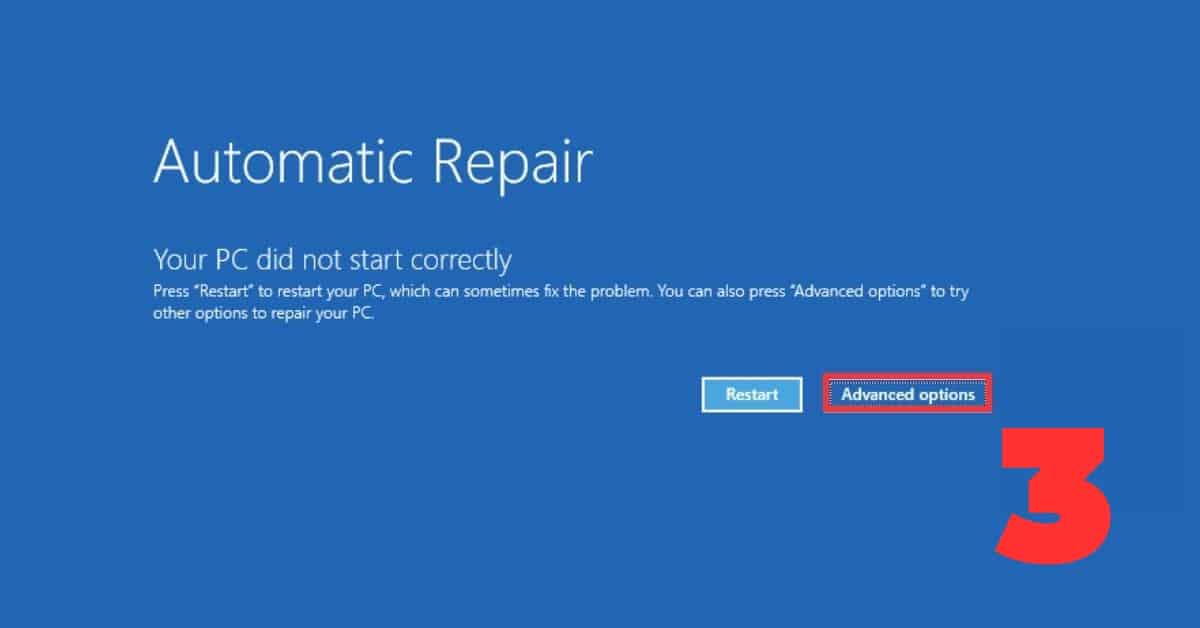
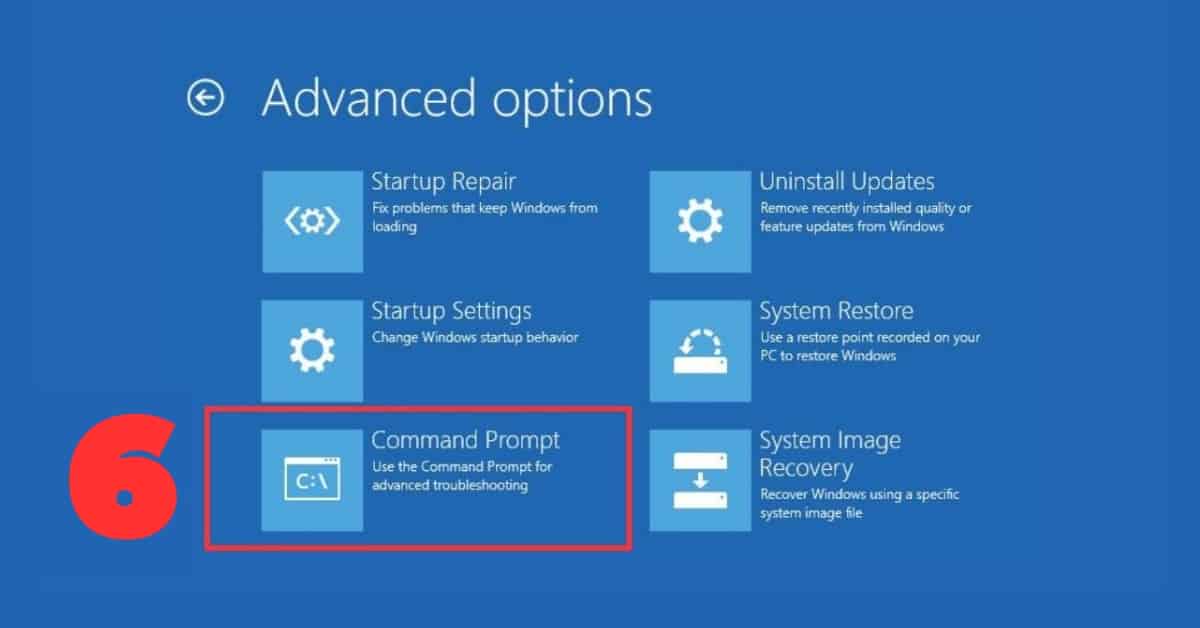
- On the Automatic Repair window, select Advanced options.
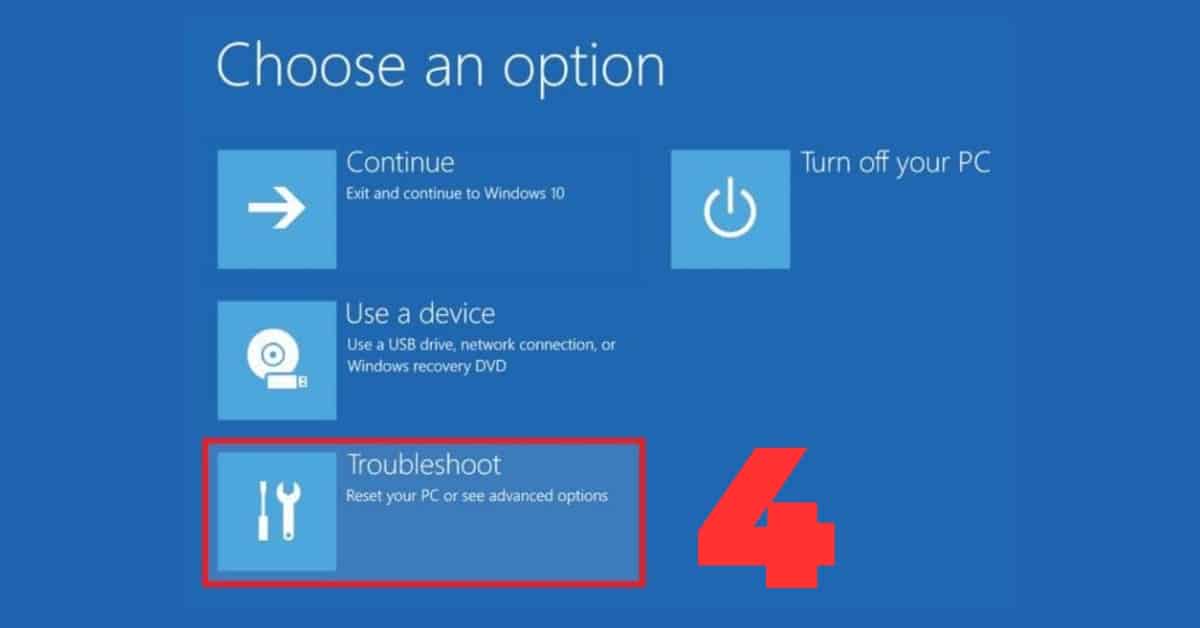
- Click on Troubleshoot option.
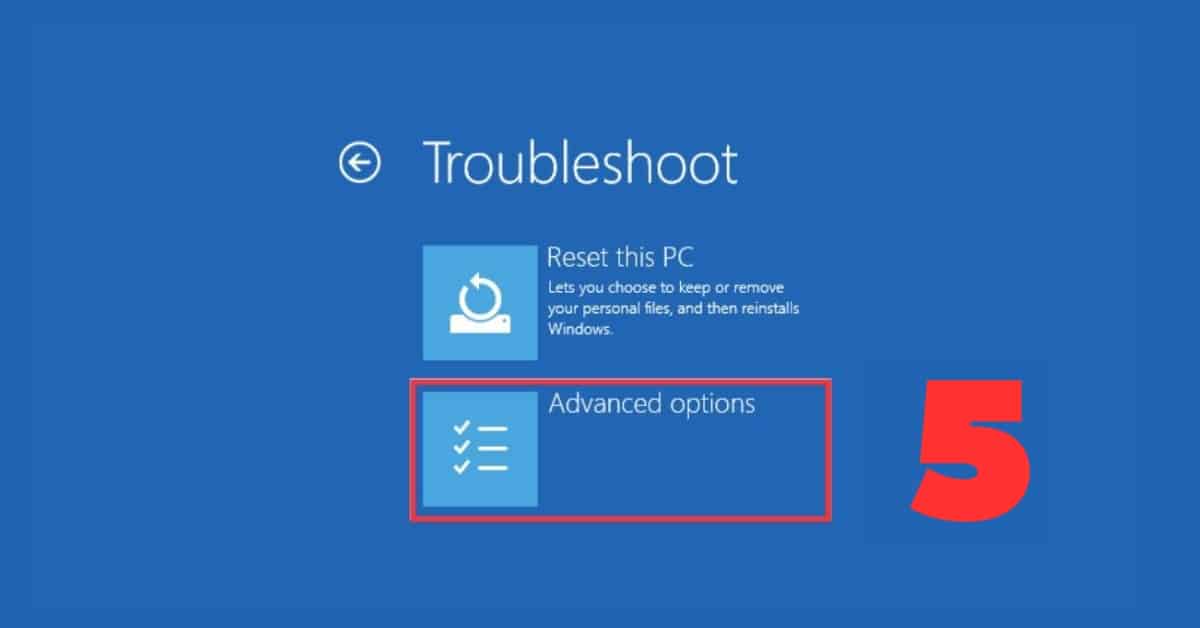
- Select the troubleshoot window Advanced options.
- Select Command Prompt option to open CMD.
- In the CMD window, type dism /online /cleanup-image /restorehealth and press Enter.
Method 5: Scheduler DISM system scan on Windows
Keep the Windows system fast and stable is a good practice to maintain the health of the Windows system. It is recommended to use constantly Deployment Image Servicing and Management repair utility. It is a good option to set up a schedule to do it automatically each week or even day. This method can be used on any version of Windows OS.
- In the search box, type to search for Task Scheduler.
- Select Run as administrator.
- In the Task Scheduler window, click on the Action menu at the top-left corner.
- Choose Create Basic Task from the list of options.
- In the Name field, type fix and click Next.
- Set the frequency for running the system fix tool. It is recommended to run it once a week. Click Next.
- Choose the preferred time and weekday for the system scan. The scan usually takes about 5 minutes. Click Next.
- Select Start a program and click Next.
- In the Program/script field, type cmd,exe.
- In the Add arguments field, type dism /online /cleanup-image /restorehealth and click Next.
- Review the summary window to ensure that everything is filled correctly. Confirm the task by clicking Finish.


Method 6: Create DISM.bat file to run fix utility on any Windows OS
Deployment Image Servicing and Management is a command-line that can be opened with one click on any version of Windows OS. Just need to create a batch file – DISM.bat. This file can be shared through e-mail or flash drive and will work on any Windows 11, Windows 10, Windows 8.1, Windows 8, or Windows 7.
- Open Run window by pressing the Windows key + R.
- In the Run window, type Notepad and click OK.
- In the Notepad document, copy/paste: dism /online /cleanup-image /restorehealth
- Save the file by clicking, on the File menu and on drop-down menu, select Save As.
- Name the file Repair.bat and click Save.
- Right-click on the saved Repair.bat file
- Select Run as administrator.


DISM messages notes after system check
- The operation completed successfully. – This message indicates that the task was successfully completed without any errors.
- The restore operation completed successfully. The component store corruption was repaired. – This note announces that the utility repaired issues and restored files to their original state.
- The cleanup operation completed successfully. The component store corruption was repaired. – it is explained that the fix tool was able to clean up unnecessary files and repair issues.
- The source files could not be found. – The utility announces that the required files necessary for repairing Windows were not found.
- The source files are missing or corrupted. – The pop-up indicates that the source files are missing or corrupted.
- The specified package is not applicable to this image. – It is the alert that the installed or removed package is not compatible with the version of Windows.

DISM (Deployment Image Servicing and Management) is an OS in-build command-line that can be opened on any version of Windows OS. Windows 11, Windows 10, Windows 8.1, Windows 8, or Windows 7. It is a system fix utility that can repair PC automatically.
The DISM command-line can be accessed via the Command Prompt (CMD), PowerShell or on the Windows recovery mode.
The in-build utility should fix or repair damaged windows system files automatically. It is recommended to run System File Checker (SFC) as well.
To keep the Windows system stable and healthy, it is recommended to use the utility continuously. The built-in tool is designed to repair and maintain the health of the Windows operating system
Open File Explorer and navigate to C:\Windows\Logs\DISM. The log file will be generated after the scan is completed.


I saw your article, and your creative ideas are of great help to me. However, I have doubts about some issues, can you answer them for me? I will continue to pay attention to your reply. Thanks.